You can save money by printing your own shipping labels through PayPal in comparison to postage purchased at the United States Postal Service. In fact, if you are mailing Disney pins for trade or sale you can save up to $1 per label on a First Class Parcel (weight up to 4 ounces). That’s an incredible savings, especially if you are mailing multiple trades.
So, how do you make a shipping label in PayPal? Just follow this simple walkthrough.
How to Make a Shipping Label in PayPal
First things first, go to this web address: www.paypal.com/shiplabel/create or simply click that handy link I just made.
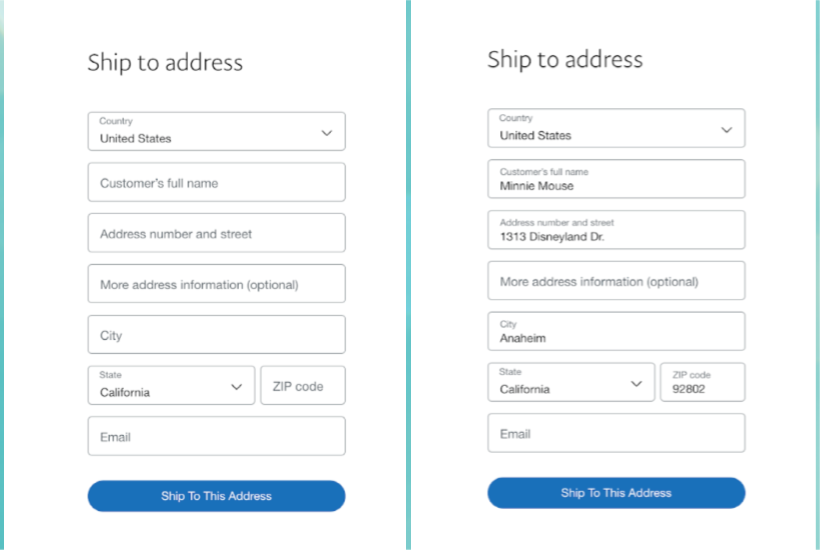
This Ship to Address panel will pop up. It defaults to the County United States, but you can change that if you are shipping to Canada or other International destinations. For the sake of this walkthrough, we are shipping within the United States.
Fill in your address and click the Ship To This Address button.
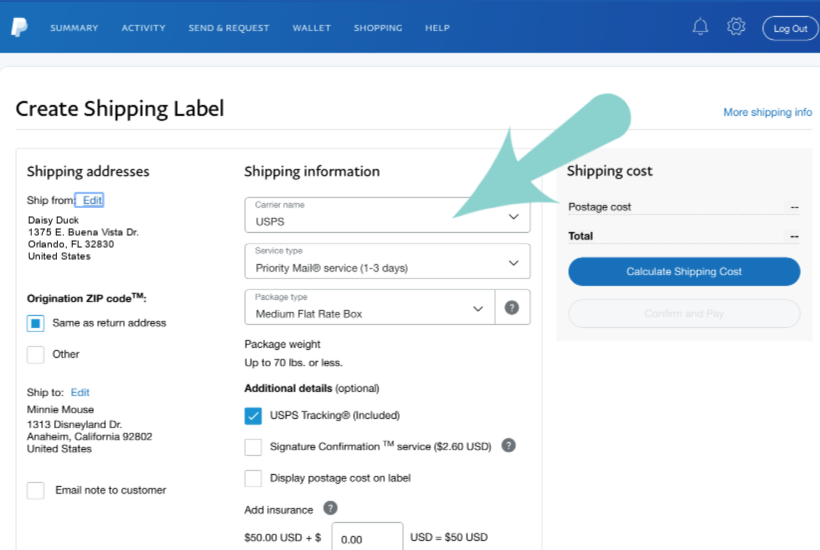
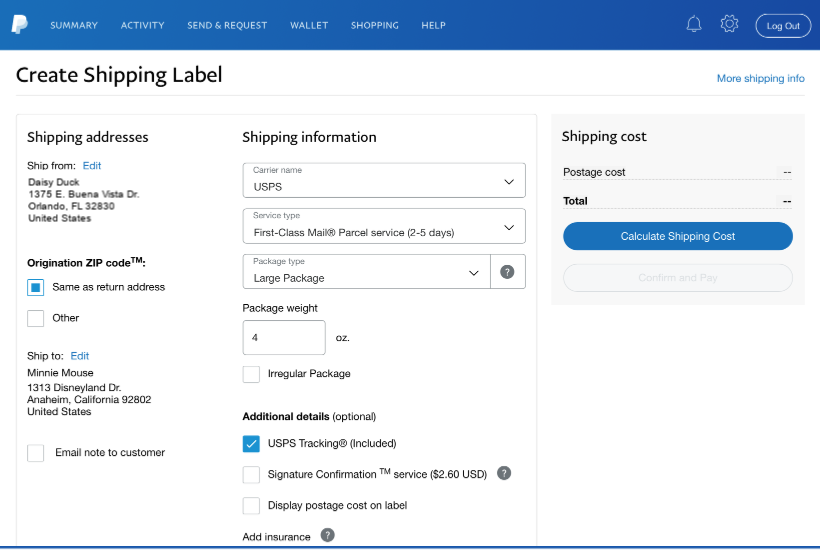
This will take you to the Create Shipping Label window. There are just a few simple things you need to do here. Under Shipping Information are three drop-down windows. The first is labeled Carrier Name and should default to USPS, if not just make sure that is selected.

The second drop-down window lists the Service type options, which defaults to Priority Mail. Click it to select First Class Mail Parcel service.
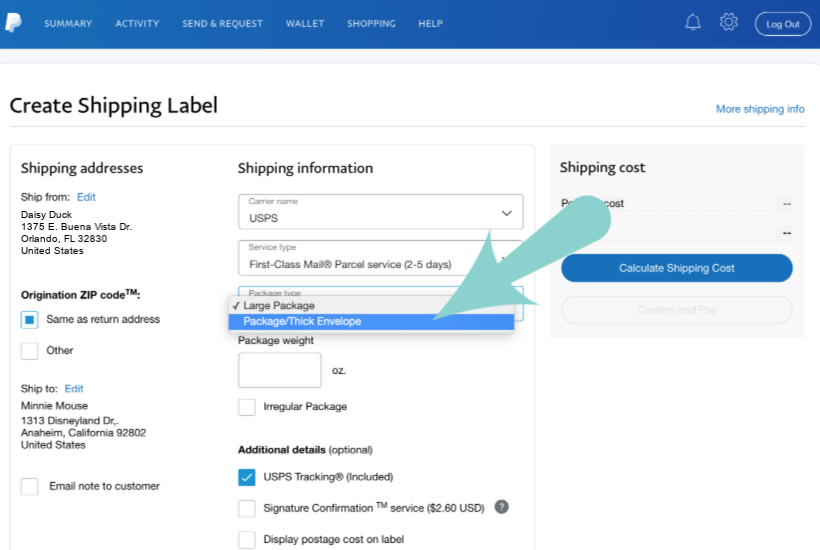
The third drop-down window lists the Package type options. Click to select Package/Thick Envelope.
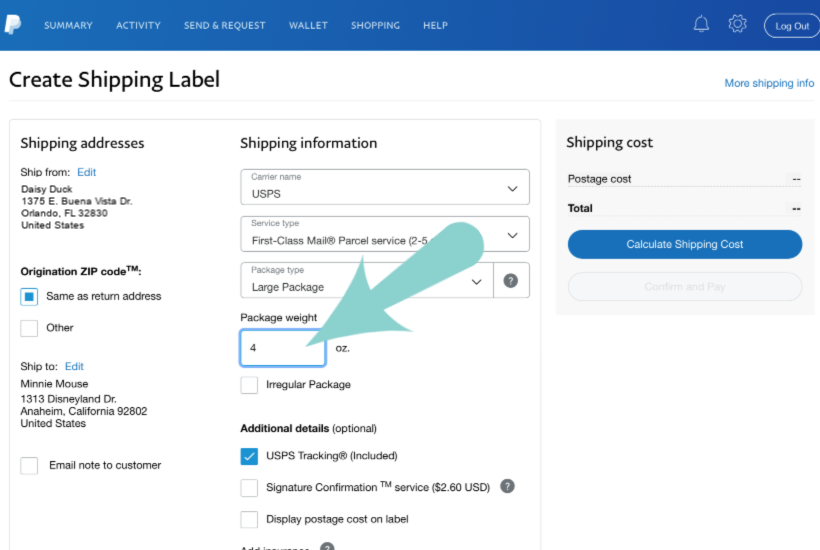
The next step is to put the weight of your package into the Package weight section. This is in ounces and you will need to round up to the nearest ounce. So, if your package weighs 2.68 ounces, you will put 3 in this section. You will pay the same price for up to 4 ounces and most pin mail packages will weigh in under this. However, it can be more if there are a lot of pins, heavier pins, or even many extras in the mailer. Please be sure to weigh your package so you can get the correct postage. A kitchen scale will do the job well for you.
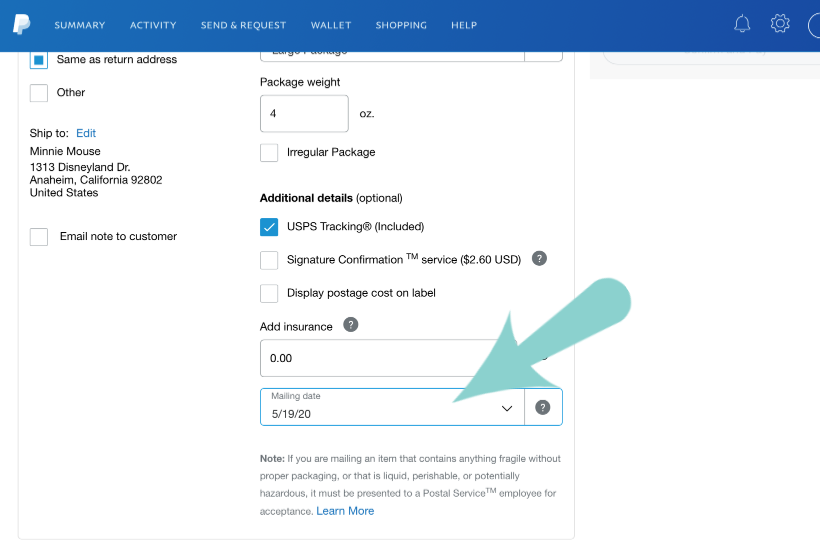
The last thing to do on this page is to select your Mailing date. You can create your labels up to a few days before mailing, which is really helpful when working with multiple pin trades or even pin sales.
So everything looks in order, it’s time to hit the blue button to Calculate Shipping Cost.
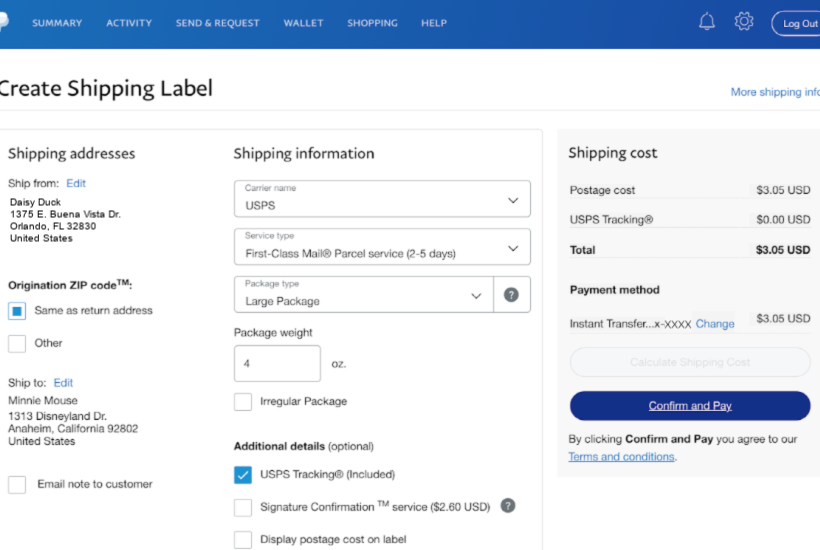
Once the shipping is calculated, you will see the Total due. Your Payment method will default to the method you have attached to your PayPal account. If you want to pay another way, you can Change it here. Once everything is correct, click the blue button to Confirm and Pay.
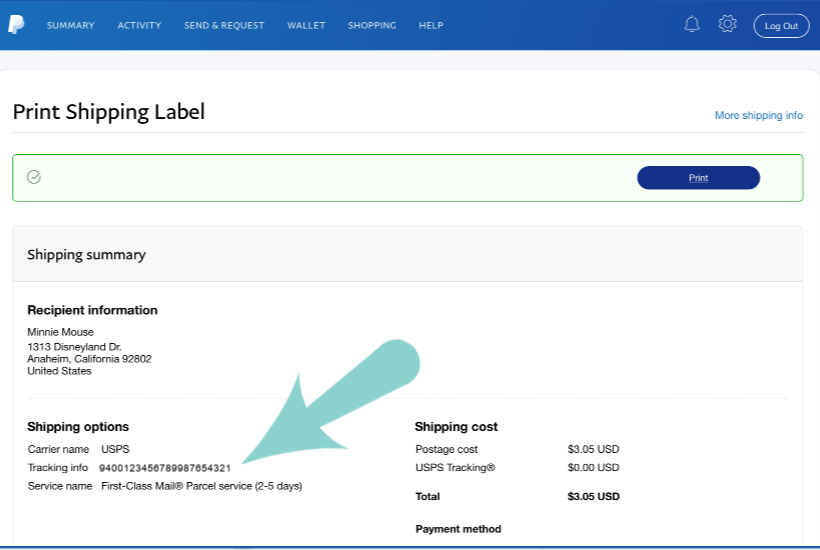
This will bring you to the Print Shipping Label window. Here you will find the Tracking info which you can copy and send to the recipient. You will also print the shipping label here by clicking the blue Print button.
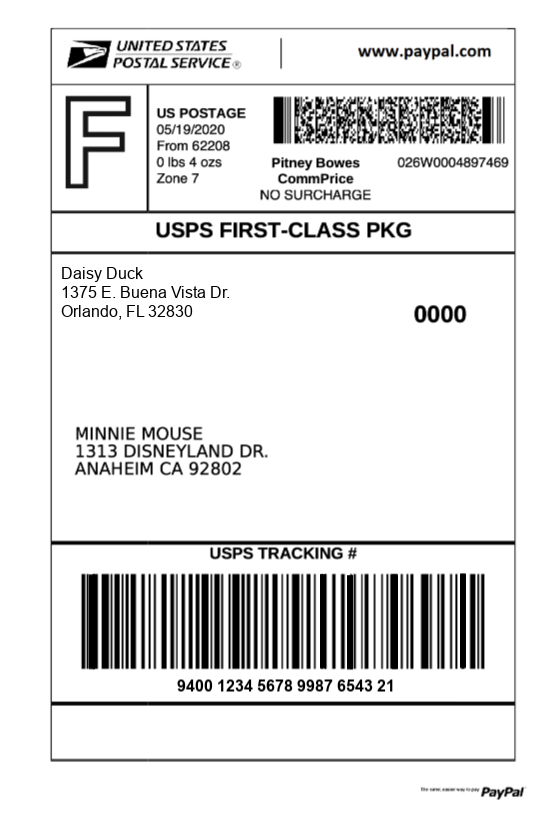
You can attach the printed shipping label to your bubble mailer with tape. You will also note the USPS Tracking # is here, too. Either type the tracking # out or take a quick photo of this label, including a clear view of the tracking, and send it to your recipient.
And that’s all there is to it! Oh, don’t forget to MAIL the package. 🤗💌
